
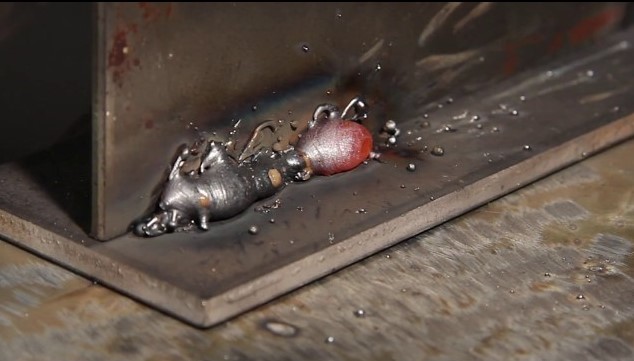
A weld bead is the visible deposit of filler material left on a joint after a welding process is completed. Understanding what is weld bead quality is essential for structural integrity, as it serves as both the physical bond and the aesthetic signature of a welder’s skill.
If you have ever spent time around a fabrication shop, you have likely heard the term “weld bead” tossed around constantly. Whether you are just starting your journey with a MIG welder or you are a seasoned pro in 2026, the weld bead is the heart of your craft.
It is more than just a line of metal; it is the physical proof of your heat control, your steady hand, and your understanding of physics. Understanding exactly what is weld bead is the first step toward mastering the art of metal joining.
When we ask what is weld bead, we are really asking about the result of a thermal reaction. During the welding process, intense heat melts the base metal and the filler wire. As this molten pool cools and solidifies, it forms a ridge or a series of ripples.
That ridge is your weld bead. While it sounds simple, the difference between a weak, ugly bead and a structural masterpiece lies in the fine details of how you manage that molten puddle.
Key Takeaways
- Definition: A weld bead is the material fused into the joint that holds two pieces of metal together.
- Quality Indicators: A high-quality weld bead shows consistent width, uniform ripple patterns, and no signs of undercutting.
- Technique Matters: Factors like travel speed, electrode angle, and amperage directly dictate the shape and strength of your bead.
- Visual Inspection: You can learn a lot about your settings just by looking at the geometry of the finished weld.
- Common Defects: Recognizing issues like porosity or lack of fusion early helps you adjust your process for stronger results.
- Professional Growth: Mastering your weld bead profile is the fastest way to transition from a beginner to a pro in the shop.
The Anatomy of a Perfect Weld Bead
To truly understand what is weld bead, you must look at its anatomy. A weld bead is not just a uniform lump of metal; it is a complex structure that contains specific features. Recognizing these features allows you to diagnose your welding performance instantly.
The Ripples and the Toes
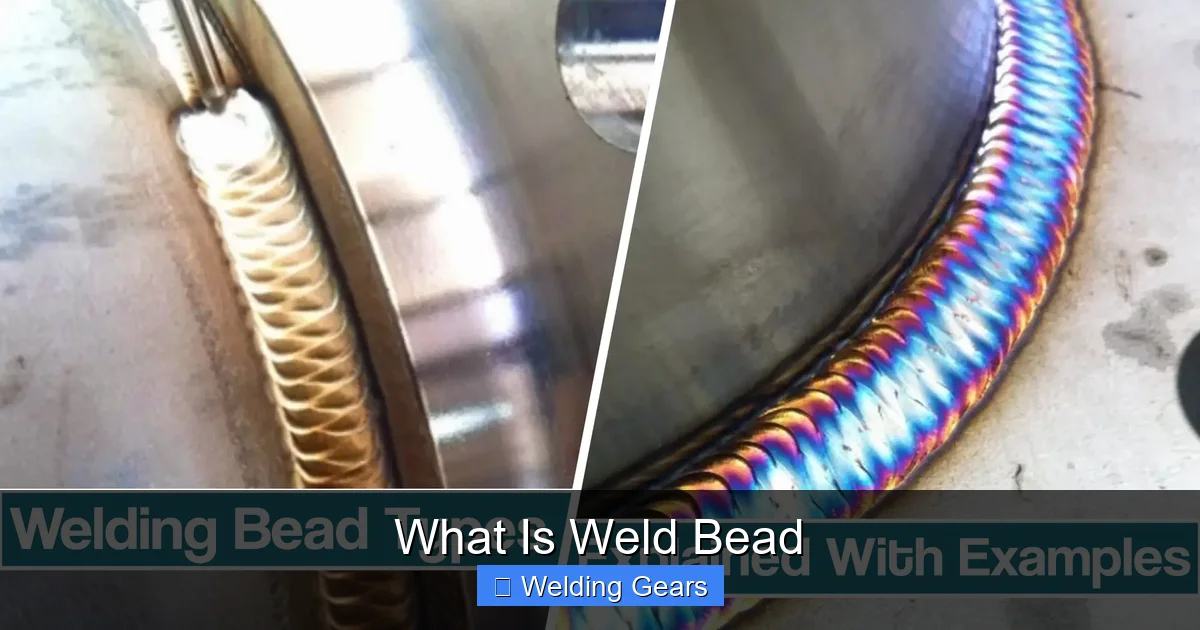
The “ripples” are those characteristic crescent shapes you see along the length of the bead. They are created by the oscillating motion of the electrode or the pulsing of the wire feed. A good weld bead has tight, consistent ripples.
If the ripples are spread too far apart, it suggests your travel speed might be too fast. The “toes” of the weld bead are the edges where the weld meets the base metal. A smooth transition at the toes is critical because this is where stress concentrations often occur.
Penetration and Profile
Penetration refers to how deep the weld goes into the base metal. You want the weld bead to fuse deep enough to create a strong joint without burning through the material. The profile refers to the shape of the bead whether it is convex (raised), concave (sunken), or flat. For most structural work, a slightly convex or flat bead is preferred to ensure enough material is present to handle the load.
What Is Weld Bead Quality: Signs of Success
How can you tell if your weld is up to code? By 2026 standards, visual inspection remains the primary way to gauge initial quality. When you finish a pass, take a moment to look at your work before you reach for the wire brush.
Visual guide about What Is Weld Bead
Image source: weldingpros.net
Uniformity Is Key
If you ask an instructor what is weld bead excellence, they will almost always say “consistency.” A great weld bead should look identical from start to finish. If your bead gets wider in the middle or starts to wander, your hand speed or torch angle is likely changing. Practice keeping a rhythmic pace. If you are using a stick welder, focus on the sound of the arc to keep your rhythm steady.
Absence of Defects
A high-quality weld bead should be free of “undercut.” Undercut is a groove or trench melted into the base metal right at the edge of the weld. It creates a weak point where the metal is thinner than the surrounding area.
Another thing to look for is “porosity.” If you see tiny pinholes on the surface of your bead, it means gas is getting trapped in the weld puddle. This usually indicates a problem with your shielding gas flow or dirty metal surfaces.
Technical Factors Influencing Your Bead
Your equipment settings act as the foundation for your weld bead. If you do not have your machine tuned correctly, no amount of technique will save your weld. Here is how settings change what is weld bead performance.
Amperage and Voltage
Amperage controls the heat. Too much heat can make your weld bead puddle run wild, leading to burn-through or excessive spatter. Too little heat prevents the weld from “wetting out,” meaning the bead sits on top of the surface like a cold glob of toothpaste. Voltage, on the other hand, determines the width and height of the bead. Finding the “sweet spot” requires trial and error on scrap pieces of the same thickness as your project.
Electrode Angle and Stick-out
For MIG welding, your torch angle matters immensely. Usually, a 15-degree push or drag angle is standard. If you deviate too far from this, the shielding gas cannot protect the puddle properly, which ruins the weld bead integrity.
Keep your wire stick-out (the length of wire extending from the nozzle) consistent. A long stick-out increases electrical resistance, which lowers your heat and results in a weak, stringy bead.
Common Weld Bead Problems and Fixes
Every welder deals with bad beads now and then. When you are learning what is weld bead troubleshooting, you learn to read the metal like a book. If you see a high, narrow bead, you might be moving too fast or using too little amperage. Try slowing down your travel speed or bumping up your settings slightly.
Fixing Concave Beads
A concave weld bead one that looks like it is scooped out in the middle usually happens when the arc is too long or the travel speed is too slow. This can also indicate that you are moving the electrode in a way that pulls the puddle away from the edges. Ensure your arc gap is tight and controlled. Focus on keeping the wire tip pointed at the leading edge of the puddle.
Cleaning Your Metal
You cannot have a perfect weld bead if you are welding through rust, oil, or paint. Impurities turn into gas when heated, and that gas creates bubbles (porosity) in your bead. Always grind or wire-brush your base metal until it is shiny. Spending five extra minutes prepping the joint is the secret to a professional-looking bead that passes every inspection.
The Evolution of Weld Beads in 2026
As we move through 2026, technology is changing how we view the weld bead. We now have smart welding machines that provide real-time feedback on bead quality. These machines monitor the arc stability and heat input, giving the welder an instant readout on whether their bead is within the desired parameters.
Digital Feedback Loops
Modern welding power sources can now detect the exact moment a bead starts to deviate from the programmed settings. They adjust the voltage automatically to keep the weld bead consistent. This takes the guesswork out of the process, but it does not replace the need for human skill. Even with smart machines, you still need to understand what is weld bead dynamics to position the torch correctly.
Training Through Simulation
Virtual reality welding simulators have become common in trade schools this year. These systems allow students to practice their bead movement for hundreds of hours without wasting a single ounce of metal or gas. By analyzing the “virtual” weld bead, students learn the perfect timing and angle required for high-quality work before they ever strike an arc on real steel.
Safety and Maintenance for Bead Perfection
Remember that the quality of your weld bead is also tied to the maintenance of your gear. A clogged nozzle, a worn-out contact tip, or a fraying ground cable will all manifest as poor weld bead quality. Always check your consumables before starting a big project.
Equipment Care
If your weld bead looks erratic, check your drive rolls and liners. A slipping wire feed causes the arc to stutter, which ruins the ripple pattern of your bead. Keeping your equipment clean is not just about longevity; it is about ensuring that every weld bead you lay is as consistent as the last.
Protecting Yourself
High-quality welds require focus. Use an auto-darkening helmet with a clear lens so you can see the bead forming in real-time. If you cannot see the edge of the puddle, you cannot control the bead. Good lighting in your shop is just as important as the welder itself. You are the architect of the bead, and your vision is your most important tool. In conclusion, mastering the weld bead is a journey of patience and practice. It is the visible result of your dedication to the craft.
By paying attention to your settings, keeping your metal clean, and maintaining your gear, you will move from struggling with beads to laying down consistent, strong, and beautiful welds every single time. Keep practicing, keep observing, and you will soon find that what is weld bead becomes second nature to you.
Frequently Asked Questions
What is the ideal shape of a weld bead?
An ideal weld bead is generally slightly convex or flat, with uniform ripples and a smooth transition into the base metal. This profile ensures sufficient strength and prevents stress concentrations at the edges.
Why is my weld bead porous?
Porosity is usually caused by contaminants like oil, rust, or paint on the metal, or by an inadequate flow of shielding gas. Ensure your base metal is clean and that there is no draft blowing away your gas coverage.
What does a concave weld bead mean?
A concave weld bead often indicates that you are moving too slowly or using an arc that is too long. This shape can lead to cracking, so focus on tightening your arc and increasing your travel speed slightly.
Does travel speed affect weld bead width?
Yes, travel speed has a huge impact; moving too quickly creates a thin, narrow bead with poor penetration, while moving too slowly creates a wide, “globby” bead with excessive heat input.
How do I stop undercutting on the edges of the bead?
Undercutting often happens when you use too much heat or pause too long at the sides of your weave. Try reducing your amperage and focusing on moving across the center of the weld slightly faster.
Can I improve my weld bead appearance with practice?
Absolutely, welding is a motor skill that improves with muscle memory and repetition. Spend time on scrap metal practicing steady movement and consistent electrode angles to refine your bead aesthetics.