A basic semiautomatic welding system consists of a power source, a wire feeder, a welding gun, a shielding gas supply, and a ground clamp. Understanding how these components work together is the first step toward mastering high-quality, efficient metal fabrication in your workshop.
If you have ever walked into a professional fabrication shop, you know the sound. It is a rhythmic, steady hum followed by a crisp crackle. That is the sound of a semiautomatic welding system doing its job. Whether you are building custom furniture, fixing a truck frame, or just starting out as a hobbyist, knowing what items make up a basic semiautomatic welding system is vital.
It is not just about grabbing a machine and pulling a trigger; it is about understanding the synergy between electricity, metal, and gas. In 2026, technology has made welding more accessible than ever, but the core principles remain the same.
A semiautomatic system, commonly known as MIG (Metal Inert Gas) welding, relies on a constant supply of filler wire fed through a gun. When we talk about a basic system, we are looking at a specific set of tools that work in harmony to join metals. By the end of this guide, you will have a clear picture of exactly what sits on your workbench and why every piece matters.
Key Takeaways
- The Power Source: This acts as the heart of your system, converting electricity into the stable current required to melt metal.
- Wire Feed Mechanism: A reliable feeder ensures a steady supply of filler material, which is critical for maintaining a smooth, consistent weld bead.
- The Welding Gun: Serving as the interface between you and the arc, the gun directs the current and shielding gas to the joint.
- Shielding Gas: Protecting your weld from atmospheric contamination is essential for preventing porosity and ensuring structural integrity.
- Grounding and Work Leads: Completing the electrical circuit is non-negotiable for safety and achieving a stable arc.
- Consumables Matter: Regularly replacing tips and nozzles prevents common defects and keeps your system running efficiently.
The Power Source: The Heart of the Operation
Every welding setup starts with a power source. Think of this as the engine of your welding rig. Its job is simple but demanding: it takes the electricity from your wall outlet or generator and transforms it into a steady flow of power that can melt steel, stainless steel, or aluminum. In a modern 2026 setup, you will likely encounter inverter-based power sources.
Understanding Constant Voltage
Unlike stick welding, which uses a constant current, a semiautomatic welding system uses constant voltage. This means the machine tries to maintain a set voltage level regardless of how far you hold the gun from the metal. This makes your life much easier as a welder. If your hand moves slightly, the machine compensates to keep the arc stable. This is why beginners often find semiautomatic welding easier to learn than other methods.
Portability and Inverter Tech
Years ago, power sources were massive, heavy, and hard to move. Today, inverter technology has shrunk these machines down to the size of a small toolbox. These machines are efficient, draw less power, and offer precise control over your heat settings. When shopping for your system, look for a power source that allows you to adjust both voltage and wire speed independently.
The Wire Feed System: Precision Delivery
The wire feed system is the secret to a great weld. If the wire doesn’t come out at the right speed, your weld will be inconsistent, messy, or even fail to penetrate the metal. This component is usually tucked inside the main welding machine or housed in a separate cabinet connected by heavy-duty cables.

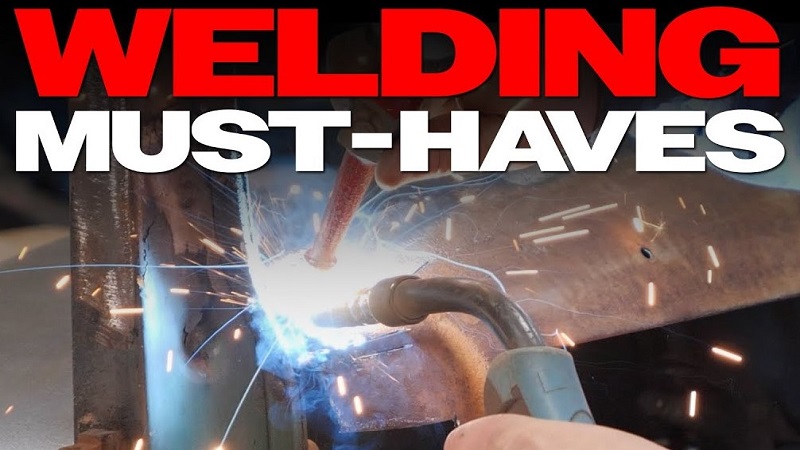
Visual guide about What Items Make Up a Basic Semiautomatic Welding System
Image source: texasheart.org
Drive Rolls and Tensioners
Inside the feeder, you will find drive rolls. These little metal wheels grab the welding wire and push it through the hose toward the gun. It is important to match your drive rolls to the size and type of wire you are using. For example, steel wire needs a different groove than soft aluminum wire. If you find your wire is bunching up or slipping, the first thing to check is the tension on these rolls.
The Spool Holder
Attached to the feeder is a spindle that holds your spool of wire. Whether you are using a two-pound spool for small jobs or a heavy forty-pound spool for production work, the spool holder must rotate smoothly. A bit of drag is necessary to prevent the spool from unspooling too fast, which can cause a “bird’s nest” of tangled wire inside your machine.
The Welding Gun: Your Control Interface
The welding gun is what you hold in your hand for hours at a time. It is effectively the conductor’s baton. When you pull the trigger, two things happen simultaneously: the wire feed motor starts, and the solenoid opens to release the shielding gas. A good gun should be comfortable, lightweight, and rated for the amount of amperage you plan to use.
Consumables: The Small Parts That Make a Big Difference
At the very end of your gun, you have the nozzle and the contact tip. The nozzle directs the gas over the weld pool, while the contact tip transfers the electrical current to the wire. These are consumables. They get hot, they collect spatter, and they eventually wear out. Keeping a stock of extra tips and nozzles is a pro tip that will save you from having to stop work mid-project because your arc started sputtering.
Cable Flexibility
Don’t overlook the whip the cable that connects the gun to the machine. A stiff or heavy cable will tire out your wrist quickly. In 2026, many high-end guns come with flexible, high-durability hoses that allow you to reach difficult angles without the cable fighting you every step of the way.
Shielding Gas and Delivery: Protecting Your Weld
Why do we need gas? When you melt metal, it becomes highly reactive. Oxygen and nitrogen in the air want to invade the molten pool, which leads to porosity—those tiny, ugly bubbles that ruin the strength of a weld. Shielding gas forms a protective cloud around the arc to keep the atmosphere away while the metal solidifies.
Gas Cylinders and Regulators
Your system will need a cylinder of shielding gas, usually a mix of argon and carbon dioxide. To control this flow, you need a regulator and a flow meter. The regulator reduces the high pressure from the tank to a safe working pressure, while the flow meter tells you exactly how many cubic feet per hour (CFH) of gas is hitting the weld. Too little gas leaves the weld exposed; too much gas can create turbulence and pull air back into the pool.
The Solenoid Valve
Inside your welding machine is a small electromagnetic switch called a solenoid. This is the “gatekeeper” for your gas. When you press the gun trigger, the solenoid clicks open. When you release it, it clicks shut. This ensures you aren’t wasting expensive gas while you are just setting up your next piece of metal.
Grounding and Work Leads: Closing the Loop
You cannot have a weld without a complete electrical circuit. This is where your ground clamp and work lead come in. The work lead is the thick cable that connects your machine to the metal you are welding. The ground clamp, often called the “earth” clamp, is the heavy-duty clip that grips the workpiece.
Placement Matters
Many beginners attach the clamp to the welding table. While this is convenient, it can lead to “arc blow” or inconsistent welds if the current has to travel through rusty hinges or dirty bolts on the table. For the best quality, clamp your ground directly to the piece of metal you are working on, as close to the joint as possible.
Cable Maintenance
Because these cables carry a lot of current, they need to be in good shape. Check them periodically for cuts, frays, or loose connections. A loose ground connection creates heat, resistance, and sparks none of which you want when you are trying to lay down a perfect bead.
Safety Gear: The Final Essential Item
While not part of the mechanical system, your safety gear is just as much a part of the “system” as the machine itself. You simply cannot weld without it. This includes an auto-darkening welding helmet, flame-resistant gloves, and a long-sleeved jacket.
In 2026, welding helmets offer incredible clarity, allowing you to see the puddle of molten metal with high-definition precision. Investing in quality gear is an investment in your eyesight and your comfort.
Conclusion
By bringing all these items together the power source, wire feed, gun, shielding gas, and grounding cables you create a complete semiautomatic welding system. Each piece plays a specific role, from the machine providing the power to the nozzle directing the gas.
Once you understand these items and how they interact, you can troubleshoot issues quickly and focus on what really matters: perfecting your technique and creating strong, beautiful welds. Happy welding!
Frequently Asked Questions
Do I really need shielding gas for all semiautomatic welding?
You only need gas if you are using solid welding wire. If you use flux-cored wire, the shielding comes from the chemical reaction of the flux inside the wire, though some flux-cored wires still benefit from gas.
What is the most common mistake beginners make with their welding system?
The most common mistake is failing to set the correct wire feed speed for the voltage selected. This leads to an unstable arc that either burns through the metal or piles up wire without melting it.
How often should I change my welding contact tip?
You should change the contact tip whenever you notice the arc becoming erratic or the wire sticking inside the tip. Keeping a clean tip is essential for consistent current transfer.
Can I run a semiautomatic welding system on a standard household outlet?
Many modern entry-level 120V machines are designed to run on standard household outlets. However, for thicker materials, you will eventually need a 240V power source to handle the higher amperage required.
Why is my weld porous?
Porosity is usually caused by insufficient shielding gas or contaminated metal. Always clean your steel with a wire brush or grinder before welding to remove rust, oil, or paint.
Does the length of the welding gun cable affect performance?
Yes, longer cables can lead to a drop in voltage and increased resistance for the wire feed motor. For most shop work, a 10 to 12-foot gun is the ideal balance between reach and performance.