
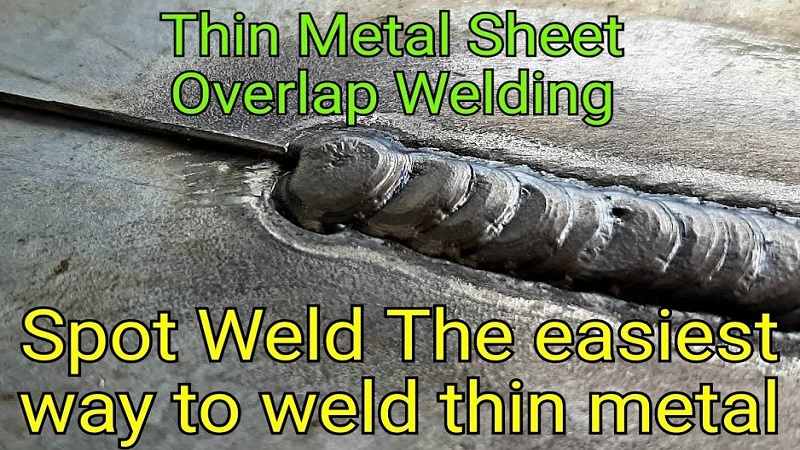
Overlap in welding is a common defect where the weld metal spills over the surface of the base metal without actually fusing to it. This creates a weak point that can lead to stress fractures and joint failure. Understanding the root causes is essential for every welder looking to improve their quality.
If you have ever spent time behind a welding hood, you know that the perfect bead is a thing of beauty. But sometimes, things do not go as planned. You finish a pass, lift your helmet, and notice that the edge of your weld looks like it is just sitting on top of the metal rather than biting into it. That annoying little overflow is what we call overlap.
Understanding what is overlap in welding is a rite of passage for every welder, from beginners in trade school to pros working in the field in 2026. In the simplest terms, overlap happens when your weld metal flows over the base metal edges but fails to fuse correctly.
It is like trying to ice a cake where the frosting slides off the side instead of sticking to the sponge. This might seem like a minor cosmetic issue, but it is a major headache for structural integrity. Because the metal does not melt into the base, you are left with a tiny gap a notch that can act like a ticking time bomb for cracks. Let’s dive deep into why this happens and how you can master your technique to avoid it entirely.
Key Takeaways
- Definition: Overlap is a surface defect where weld metal protrudes beyond the fusion line without bonding.
- Primary Causes: Often caused by incorrect heat input, wrong travel speed, or poor electrode angle.
- Structural Risk: Overlap creates a “notch” effect, which serves as a starting point for fatigue cracks under pressure.
- Prevention: Proper cleaning, optimized machine settings, and steady travel speeds are your best defenses.
- Inspection: Visual inspection is usually enough to spot overlap, as it creates a visible “toe” that doesn’t blend smoothly.
- Repair: Simply grinding away the excess metal is often not enough; you may need to re-weld or blend the area correctly.
Understanding the Mechanics of Overlap
To really grasp what is overlap in welding, we need to talk about heat and gravity. Welding is essentially a dance between melting your filler rod and melting your base metal. When the dance goes well, they blend together into a single, strong unit. When the balance is off, the filler metal gets ahead of itself.
The Role of Heat Input
Heat is the fuel for your weld. If your settings are too cold, your base metal does not become liquid enough to “accept” the filler metal. Think of it like pouring water onto a cold plate versus a hot pan. On the hot pan, the water sizzles and reacts. On the cold plate, it just sits there. When your amperage or voltage is too low, the filler metal cools down before it can wash into the base, resulting in that dreaded overlap.
The Geometry of the Bead
The shape of your weld bead matters. Ideally, you want a nice, gentle slope where the weld meets the base metal, often called the “toe” of the weld. When you have overlap, that angle is sharp and abrupt. This sharpness creates a stress riser. In a professional environment, this is usually an automatic fail during a quality inspection because the joint is not as strong as the metal around it.
Common Culprits: Why Does Overlap Happen?
You are probably wondering, “Am I doing something wrong?” Usually, the answer is just a matter of technique. By 2026, we have better equipment than ever, but the human element remains the most important part of the process. If you are seeing overlap on your test pieces, check these three areas first.
Travel Speed Troubles
Moving too slow is a classic rookie mistake. When you linger too long in one spot, you deposit way too much filler metal. The puddle grows large, gets heavy, and gravity starts pulling it over the edges of your weld groove. If you are moving too slow, the heat builds up in the puddle, but it doesn’t move forward to melt the new base metal, leaving the puddle to spill over the sides.
Incorrect Electrode Angle
Your electrode angle dictates where the arc force pushes the molten metal. If you are using a stick electrode or a MIG gun and your angle is too steep, you are essentially pushing the puddle behind you or letting it roll over the edge. Maintaining a consistent drag or push angle helps keep the puddle focused right where it needs to be: in the center of the joint.
Electrode Size and Manipulation
Sometimes the problem is the gear. If you are using an electrode that is too large for the thickness of the metal you are working on, you are going to deposit too much material. Similarly, if you are using too much “weaving” motion, you might be spreading the puddle too thin, causing the edges to cool and overlap before they properly fuse to the base material.
The Structural Risks of Ignoring Overlap
It is tempting to say, “It looks fine, it’ll hold.” But in the world of welding, looks can be deceiving. What is overlap in welding if not a hidden defect? The real danger lies in how the joint handles stress.
The Notch Effect
Engineers talk a lot about stress risers. A notch created by overlap acts exactly like a tear in a piece of paper. If you try to pull that paper apart, the tear spreads instantly. Metal behaves similarly under vibration or load. That sharp angle at the edge of the weld is where stress concentrates. Over time, even a small load can cause a fatigue crack to start at the overlap point and grow until the part fails.
Why Inspection Matters
This is why we have welding inspectors. They use visual aids, and sometimes dyes or X-rays, to look for these tiny defects. If you work on critical projects, like pressure vessels, bridges, or automotive frames, overlap is a “rejectable defect.” Knowing how to identify it on your own before the inspector arrives is the mark of a skilled tradesperson.
How to Prevent Overlap Like a Pro?
Now that we know what to look for, how do we stop it? It all comes down to controlling the puddle. If you control the puddle, you control the weld. Practice these habits to keep your beads clean and fused.
Mastering the Puddle
Focus on the leading edge of your weld puddle. You want to see the base metal melt slightly before the filler metal hits it. If you keep your eyes locked on the leading edge, you will be able to see if the metal is fusing or if it is just rolling over. If it starts to roll, speed up your travel or adjust your angle.
Optimizing Machine Settings
In 2026, many machines have smart features, but you shouldn’t rely on them entirely. Experiment with your wire feed speed or amperage. If you are getting overlap, try turning your heat up slightly or increasing your travel speed. It is a balancing act—a bit more heat will help the toes of your weld “wet out” and blend perfectly into the base metal.
Cleanliness is Godliness
Never underestimate the importance of a clean surface. Oil, rust, and paint can mess with the way the metal flows. If the surface is dirty, the arc might behave inconsistently, leading to a “lazy” puddle that doesn’t want to fuse properly. Spend that extra minute with your grinder or wire brush; it will pay off in the quality of your finish.
Advanced Techniques for Difficult Joints
Not all welds are flat on a table. Sometimes you are working vertically or overhead, where gravity is your worst enemy. This is where knowing what is overlap in welding becomes even more critical, as gravity is constantly trying to pull your puddle downward.
Vertical Welding
When welding vertically, you have to fight the drip. If you use too much heat or keep your puddle too large, gravity wins. Use a shorter arc length and try to move in a pattern that keeps the metal focused. Many welders prefer a “triangular” or “Z” pattern to keep the metal built up in the center while ensuring the toes are fused.
Overhead Welding
Overhead is the ultimate test. Here, you have to use the force of the arc to hold the puddle in place. If you get overlap here, it is usually because you are moving too slow. Keep it fast, keep the puddle small, and let the arc hold the metal against the base. If the puddle gets too big, it will sag, and you will have massive overlap along the edges.
Conclusion: The Path to Perfect Welds
Learning what is overlap in welding is not about being perfect from day one. It is about understanding the physics of the metal and the limitations of your tools. By paying attention to your heat input, keeping your travel speed consistent, and maintaining a proper electrode angle, you can eliminate overlap for good.
In 2026, the best welders are those who can diagnose their own work and make adjustments on the fly. Remember, every weld is a chance to learn. If you see overlap, don’t get discouraged. Grind it out, adjust your settings, and go again. Professionalism is defined by how we handle our mistakes as much as our successes. Keep your hood down, keep your eyes on the puddle, and keep building your skills one bead at a time.
Frequently Asked Questions
What is the easiest way to tell if I have overlap?
Overlap is usually visible to the naked eye; look for the “toe” of the weld where the metal spills over the base metal without a smooth transition. If the edge of the weld looks sharp or appears to “drip” over the side rather than blending in, you likely have an overlap issue.
Can I just grind off the overlap?
While grinding can make the weld look better, it does not fix the lack of fusion underneath the surface. In structural or critical applications, you must grind out the defect and re-weld that area to ensure the joint is sound and safe.
Does current type affect overlap?
Yes, the polarity and type of current (AC vs. DC) can influence how the puddle behaves. Choosing the right polarity for your specific electrode or wire can make it much easier to control the puddle and prevent it from spilling over the fusion line.
Is overlap the same as undercut?
No, they are opposites. Undercut is a groove or channel melted into the base metal along the edge of the weld that isn’t filled, while overlap is excess metal that sits on top of the base metal without fusing.
How does travel speed prevent overlap?
If you travel too slowly, you deposit too much material, which creates a large, heavy puddle that spills over the sides. Increasing your travel speed thins out the puddle and allows it to fuse cleanly into the base metal before it can roll over.
Do I need to change my welding angle to fix this?
Changing your electrode or gun angle can significantly improve fusion at the edges. By aiming the arc slightly more toward the base metal rather than the center of the puddle, you encourage the weld to “wash out” and fuse properly at the toes.