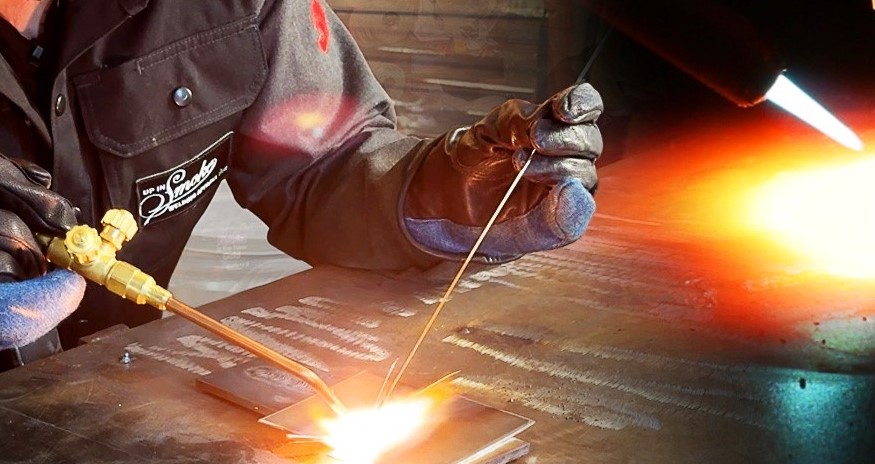
Mastering the oxygen acetylene torch is a foundational skill for any metalworker in 2026. This guide teaches you how to properly setup your equipment, control your flame, and create strong, clean welds with confidence and safety.
Learning how to weld with oxygen acetylene torch systems is like learning to paint with fire. Even in our modern age of high-tech robotic lasers and advanced digital MIG welders, the oxy-acetylene process remains a staple in workshops across the globe. It is a versatile, portable, and surprisingly intuitive method for joining metals. If you are looking to master the fundamentals of metalwork, there is no better place to start than with this classic craft.
Whether you are restoring a vintage car, building custom furniture, or simply fixing a broken gate in your backyard, knowing how to use gas welding provides a unique level of control. You are not just pushing a button; you are actively managing the chemistry of the flame. By the time you finish this guide, you will understand the essential steps to get started, the safety protocols required in 2026, and the expert techniques needed to produce professional-grade welds.
Key Takeaways
- Safety First: Always wear proper eye protection and fire-resistant clothing when you learn how to weld with oxygen acetylene torch gear.
- Gas Management: Understanding the pressure balance between oxygen and acetylene is critical for a stable and effective flame.
- Flame Types: Recognize the difference between neutral, oxidizing, and carburizing flames to ensure the right heat for your specific metal.
- Puddle Control: The secret to a quality weld is maintaining a consistent molten pool without overheating the base material.
- Equipment Care: Regular maintenance of hoses, regulators, and torch tips prevents leaks and ensures long-term tool performance.
- Practice Makes Perfect: Focus on torch angle and travel speed to master the art of smooth, uniform bead formation.
Understanding Your Gear and Safety
Before you ever strike a flame, you must respect the gear. Welding involves high-pressure gases and intense heat. Learning how to weld with oxygen acetylene torch tools begins with ensuring your workstation is ready. In 2026, we have access to better safety equipment than ever, but the basics remain the same. Always clear your area of flammable materials and ensure you have a fire extinguisher nearby.
Essential Equipment Components
Your setup consists of oxygen and acetylene cylinders, two-stage regulators, flash arrestors, hoses, and the welding torch body itself. Never skip the flash arrestors; these small devices prevent a flame from traveling back into the hoses. Always check your connections for leaks using a soapy water solution. If you see bubbles, tighten the connection before proceeding.
Protective Gear Requirements
You cannot cut corners on safety gear. You need a welding jacket or a heavy cotton shirt, gloves that can handle heat, and most importantly, goggles with the correct shade rating. For oxy-acetylene welding, a Shade 5 lens is generally the industry standard. It protects your eyes from harmful radiation while allowing you to see the molten puddle clearly.
Setting Up the Flame Correctly
The flame is the engine of your work. Learning how to weld with oxygen acetylene torch methods is impossible if you cannot adjust your gas mixture. You have two valves on your torch: one for acetylene (usually red/labeled) and one for oxygen (usually green/labeled). The goal is to create a neutral flame that provides the perfect balance of heat and chemical stability.
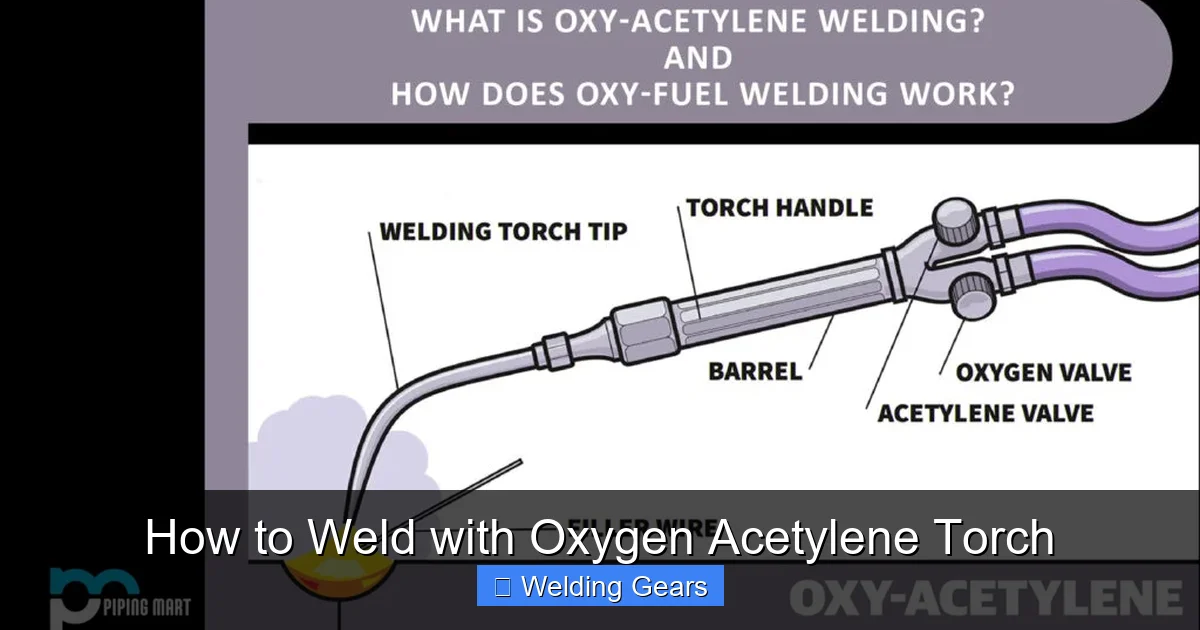
Visual guide about How to Weld with Oxygen Acetylene Torch
Image source: cdn.thepipingmart.com
The Three Flame Types
First, open the acetylene valve slightly and light it. It will be yellow and smoky. Now, add oxygen. As you introduce oxygen, the flame will shift. A carburizing flame has a feathery white cone; it adds carbon to the weld, which can make it brittle. An oxidizing flame is harsh and noisy; it will burn the metal. A neutral flame is what you want. It has a sharp, clear blue inner cone and a bright outer plume. This provides the ideal environment for your weld.
Refining Your Technique
Practice adjusting the flame on a piece of scrap metal before you start your project. You want to see that distinct inner cone about an eighth of an inch long. This is your heat source. If your flame is too large, you will melt through your workpiece. If it is too small, you won’t get the penetration you need. Listen to the sound of the torch; a healthy neutral flame has a steady, rhythmic hiss.
The Art of the Molten Puddle
The core of gas welding is the puddle. When you ask how to weld with oxygen acetylene torch setups, the answer almost always circles back to puddle control. You are essentially creating a small, liquid lake of metal on your workpiece. You then move this lake along the seam, adding filler rod as needed to build the joint.
Starting the Weld
Hold the torch in your dominant hand and the filler rod in your other. Direct the blue tip of the flame onto the metal until it begins to liquify. Don’t rush this. Once the metal turns shiny and liquid, that is your puddle. If you are welding two pieces of steel, make sure the puddle bridges both sides equally. If you see the puddle sagging, you are using too much heat or moving too slowly.
Adding Filler Material
Once you have a steady puddle, introduce the filler rod. Dip the end of the rod into the front edge of the molten pool. Don’t put the rod directly in the flame; let the puddle melt the rod. As you dip, the puddle will grow slightly. Then, move your torch forward to “drag” the puddle along the seam. It is a rhythmic dance: heat, dip, move, heat, dip, move.
Mastering Torch Angle and Travel Speed
Even with a perfect flame, bad form will lead to weak welds. When you learn how to weld with oxygen acetylene torch systems, you will find that your body position matters just as much as your equipment. Keep your torch at a slight angle, usually around 45 degrees relative to the surface of the metal.
Maintaining Consistent Speed
If you move your torch too fast, your weld will be thin and lack depth. If you move too slowly, you will end up with a large, ugly pile of metal that has likely warped the base material. Aim for a speed that keeps the puddle size consistent from start to finish. Focus on keeping your hands steady; use your non-dominant hand to guide the torch tip if you need extra support.
Positioning for Success
Make sure you are comfortable before you start. If you are leaning awkwardly, your weld will suffer. Use clamps to secure your work so you don’t have to worry about the metal shifting while you are focused on the flame. Being relaxed allows you to maintain that steady, consistent movement that defines a high-quality weld.
Troubleshooting Common Welding Issues
Everyone makes mistakes, especially when they first learn how to weld with oxygen acetylene torch tools. The trick is to diagnose your problems quickly. If your weld looks like a series of scattered dots, your heat is likely too low or you are moving too fast. If your weld is pitted or looks “burnt,” you are likely using an oxidizing flame that is consuming the metal.
Preventing Warp and Distortion
Heat warps metal. To minimize this, try to weld in short segments rather than one long, continuous pass. Let the metal cool between segments. If you are working on thin sheet metal, use copper backing plates to help dissipate the heat. This is a pro-tip that keeps your project flat and professional-looking.
Fixing Porosity
Porosity, or those tiny holes in the weld, usually happens because of dirt or oil on the metal surface. Always clean your metal with a wire brush or grinder before you start. Even a little bit of surface rust or paint can ruin an otherwise perfect weld. When in doubt, clean it again.
Conclusion: The Path to Mastery
Learning how to weld with oxygen acetylene torch equipment is a journey that rewards patience. Do not get discouraged if your first few beads look uneven or messy. Even the best welders in the world started exactly where you are today. Keep your flame neutral, keep your puddle small, and keep your hands steady.
By practicing these fundamentals, you are gaining a skill that will last a lifetime. You are no longer limited to what you can buy; you can now create, repair, and build anything you can imagine. Pick up that torch, adjust your regulators, and start making sparks. Your next great project is waiting for you at the tip of that blue cone.
Frequently Asked Questions
What is the most important safety rule for gas welding?
The most important rule is to never use oil or grease on any oxygen equipment, as it can cause a violent explosion. Always ensure your gas cylinders are chained upright and that you have a proper fire extinguisher nearby before lighting the torch.
Can I weld aluminum with an oxygen acetylene torch?
Yes, but it requires specific flux and specialized filler rods designed for aluminum. Because aluminum melts at a lower temperature and doesn’t change color before melting, it requires more practice than steel to avoid burning through the material.
Why does my torch make a loud popping sound?
A popping sound, or “backfire,” is often caused by the torch tip being too close to the puddle, causing the flame to be obstructed. It can also happen if your gas pressures are set too low for the specific tip size you are using.
How do I know if my weld is strong?
A good weld will have a uniform, ripple-like appearance and will fully fuse the two pieces of metal together without large gaps or crater-like holes. You can test your welds by cooling them and hitting them with a hammer; a good weld should not crack or peel away from the base metal.
Do I need to clean the metal before welding?
Absolutely. Surface contaminants like rust, paint, oil, and mill scale will cause the weld to bubble and weaken significantly. Using a wire brush or an angle grinder to get to clean, shiny metal is essential for a high-quality bond.
How long does it take to learn the basics?
Most beginners can learn to lay a consistent bead in about 5 to 10 hours of focused practice. However, mastering the skill to the point of structural integrity takes consistent practice over weeks or months of regular shop time.