
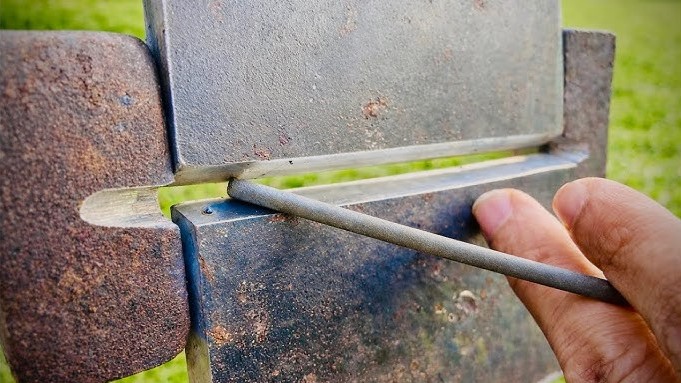
2G welding refers to the horizontal position of welding on a vertical surface, specifically on pipe or plate joints. This position requires precise control of the weld pool to prevent sagging due to gravity, making it a fundamental skill for any professional welder.
Welcome to the world of welding, where mastering the art of positioning is just as important as choosing the right machine. If you have been looking into professional welding certifications, you have likely come across the term 2G. So, what is 2G welding? Simply put, it is the horizontal welding position. Whether you are working on a massive structural beam or a critical pipe joint, understanding how to control your puddle in this orientation is a game-changer for your career.
In 2026, the welding industry continues to rely on manual skill even with the rise of automation. Knowing how to handle the horizontal plane manually keeps you valuable on any job site. While it might look straightforward on paper, the physics of gravity pulling at your molten metal makes 2G welding a unique challenge that every apprentice must overcome to become a true pro.
Understanding the Basics of 2G Welding
What Does 2G Actually Mean?
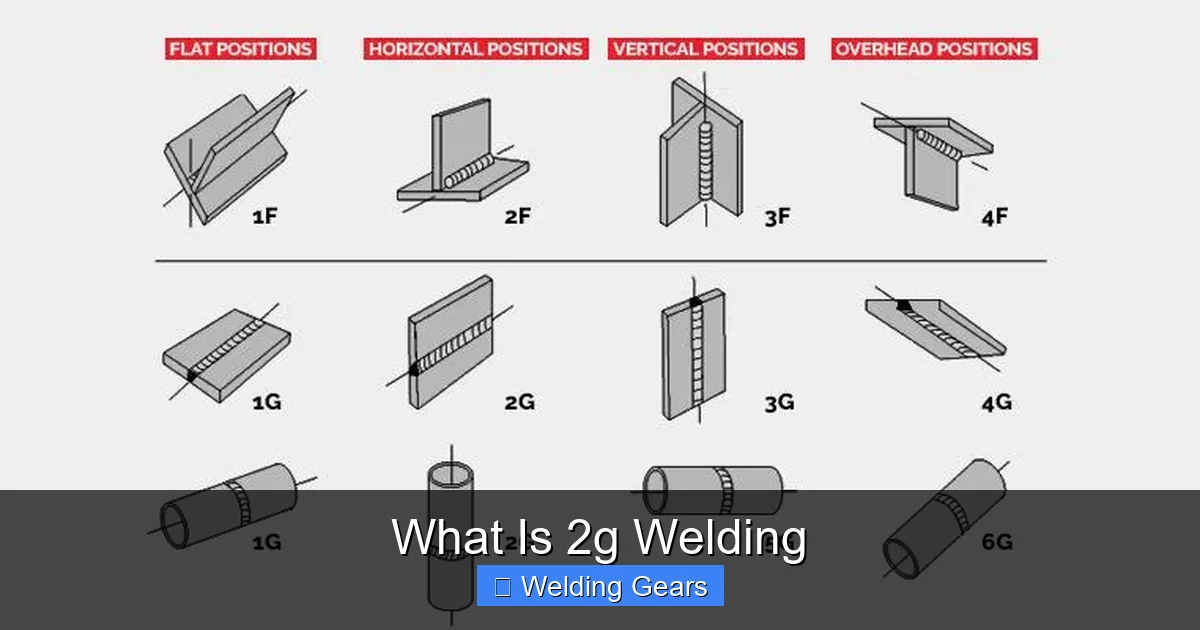
The code 2G comes from the American Welding Society (AWS) naming system. In this code, the number “2” represents the position of the joint, while the letter “G” stands for “groove.” Specifically, the 2 stands for horizontal. When you perform a 2G weld, you are welding a joint that is oriented horizontally on a vertical plane. Imagine holding a pen level while writing on a wall; that is the essence of the horizontal motion required here.
The joint itself is usually a butt joint where two pieces of metal are set side-by-side or stacked. Because the weld axis lies horizontally, the molten metal naturally wants to sag toward the bottom edge of the bevel. Controlling this flow is the hallmark of a skilled 2G welder.
Why 2G Positioning Matters
You might wonder why we don’t just rotate everything to be flat. In the real world, big structures like bridges, oil tanks, and high-rise buildings cannot be tilted or turned to make welding easy. You have to go to the work, and the work is often fixed in place. By learning 2G welding, you gain the versatility needed to complete structural repairs and assembly work without needing expensive equipment to rotate your workpiece.
Mastering the Physics of 2G Welding
Gravity is Your Greatest Enemy
In flat welding, gravity is your friend because it keeps the puddle settled in the joint. In 2G welding, gravity pulls your weld bead down. If you run your heat too high or your travel speed too slow, the metal will drip, leading to undercutting on the top side and lumpy build-up on the bottom side. To beat gravity, you need to use a shorter arc length and ensure your travel speed remains consistent.
Controlling the Weld Puddle
Think of your weld puddle as a small, living thing. In the 2G position, you want to keep the puddle small and manageable. If it gets too large, you lose control. Use a slight whip motion or a gentle circular motion to keep the heat distributed evenly. Remember, the goal is to keep the puddle attached to both the top and bottom plates simultaneously without letting it overwhelm the joint.
The Importance of Electrode Angle
Your electrode angle is the secret sauce for success. For most 2G applications, you want to aim the electrode slightly upward. By pointing the tip slightly toward the top bevel, you use the force of the arc to push the puddle against gravity. This helps “freeze” the metal in place before it has a chance to sag. A slight drag angle—about 5 to 10 degrees—is usually recommended to help push the slag behind the puddle.
Essential Equipment for 2G Success
Machine Settings for 2G
When setting up your welding machine for 2G, lean toward the lower end of your recommended amperage range. Because you are dealing with gravity, having too much heat can make the puddle “runny.” If you are using a stick welder, make sure your rod is dry. If you are using MIG, ensure your wire feed speed is dialed in to match your travel speed. A steady, consistent arc is non-negotiable for horizontal welds.
PPE and Safety Measures
Safety is the same in 2G as it is in any other position, but because you are welding horizontally, you might find yourself leaning into the workpiece more. Ensure your jacket is properly secured to avoid sparks getting trapped. Always use a high-quality auto-darkening helmet that allows you to see the edges of the weld clearly. In 2026, many welders are switching to lightweight, breathable flame-resistant gear that makes maneuvering in horizontal positions much easier.
Practical Tips for 2G Certification
Preparation is Half the Battle
Before you even strike an arc, ensure your metal is cleaned properly. Remove rust, mill scale, and paint. If you are preparing a test plate, double-check your bevel angle. Most 2G tests require a specific root opening and bevel angle. If these are off by even a millimeter, your ability to control the puddle will be significantly harder. Take your time with the grinder.
Walking the Cup vs. Freehand
If you are doing TIG welding in the 2G position, many experts recommend “walking the cup.” This technique provides a steady support against the pipe or plate, which reduces fatigue and keeps your arc length uniform. If you are doing stick or MIG, freehand is standard. Practice maintaining a consistent gap between your hand and the wall to keep your arc length steady throughout the entire length of the weld.
Common Mistakes to Avoid
The most common mistake beginners make is “losing” the top edge. When you concentrate too much on the bottom, the top of the weld doesn’t fuse to the parent metal, creating a classic undercut. Always make a conscious effort to pause slightly on the top edge of your weave. This hesitation allows the weld to fill the top bevel properly, creating a smooth transition that passes inspection.
Beyond the Basics: Advancements in 2G Welding
The Role of Technology in 2026
In 2026, we are seeing more pulse-welding machines that make 2G positions significantly easier. Pulsed MIG, for example, allows you to maintain a high heat for penetration while letting the puddle cool momentarily between pulses. This is a game-changer for horizontal work. If your shop has access to these machines, learn how to adjust the pulse frequency to find the “sweet spot” where the metal freezes exactly when you want it to.
Mentorship and Practice
Nothing replaces hours under the hood. Find a mentor who has years of experience in structural steel. Watch their hand movements. Do they move quickly? Do they use a specific weave? Often, 2G welding is about rhythm. If you find your rhythm, you can produce consistent, high-quality beads that look like they were laid by a robot. Don’t be afraid to scrap a few plates that is exactly how the pros learned.
Conclusion
So, what is 2G welding? It is a fundamental skill that bridges the gap between basic flat welding and the complex, all-position work required on high-stakes projects. It requires patience, a steady hand, and a respect for the laws of physics. By mastering the horizontal position, you ensure that you can tackle nearly any job that comes your way in the shop or on the field.
As you continue your journey through 2026, keep pushing yourself to try different rods and wires. Every manufacturer offers slightly different consumables that behave differently in the 2G position. The more you experiment, the better you will understand the nuances of the arc. Stay safe, keep your gear in top shape, and remember that every perfect horizontal bead is one step closer to becoming a master welder.
Frequently Asked Questions
What is the difference between 1G and 2G welding?
1G is the flat position, where the weld is performed on top of a horizontal surface, making it the easiest position. 2G is the horizontal position, where the weld is performed on a vertical surface, requiring more control to combat gravity.
Is 2G welding considered difficult for beginners?
2G is generally considered an intermediate skill level. It is more challenging than flat welding because the molten metal tends to sag, but it is much easier than vertical (3G) or overhead (4G) welding.
What electrode angle should I use for 2G?
You should use a slight upward work angle (pointing the electrode tip toward the top bevel) to help support the puddle. A travel angle of about 5 to 10 degrees is standard for most manual processes.
Can I use the same settings for 2G as I do for 1G?
Generally, no. You often need to lower your amperage slightly for 2G welding to prevent the weld puddle from becoming too fluid and running down the plate.
What does the “G” stand for in 2G?
The “G” stands for “groove,” indicating that the weld is being performed on a groove joint, such as two pieces of pipe or plate butted against each other.
How do I know if my 2G weld is successful?
A successful 2G weld should have consistent bead width, no undercut on the top edge, and no sagging or excess build-up on the bottom edge. It should exhibit uniform penetration across the entire length of the joint.