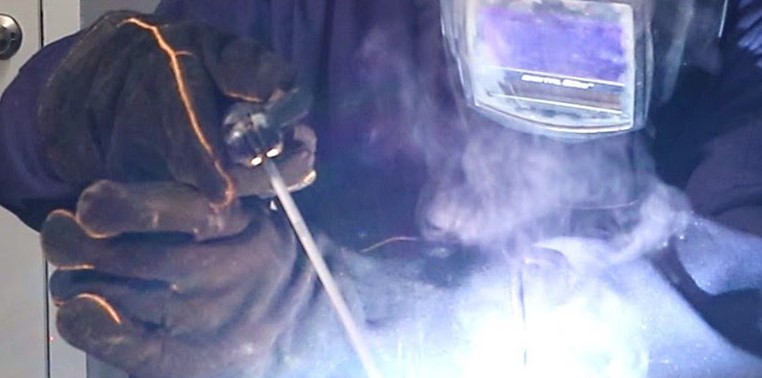
Stick welding, officially known as Shielded Metal Arc Welding, remains the most versatile skill for any metalworker in 2026. This guide will walk you through the essential techniques, safety protocols, and equipment setups needed to achieve strong, professional-grade welds on your very first try.
Welcome to the world of manual arc welding. If you have ever looked at a piece of steel and wondered how it became a permanent structure, you are looking at the magic of stick welding. Even in our high-tech 2026 landscape, stick welding remains the backbone of construction, farm repair, and hobbyist fabrication. It is rugged, portable, and incredibly satisfying to master.
Learning how to weld with stick is like learning to ride a bicycle. It feels wobbly at first, but once you find your balance and rhythm, it becomes second nature. Whether you are fixing a broken tractor gate or building a custom workbench, stick welding gives you the power to fuse metal with nothing more than an electrode and a spark. Let us dive into the fundamentals.
Key Takeaways
- Preparation is Priority: Cleaning your base metal is the secret to a smooth, splatter-free stick welding experience.
- Electrode Selection Matters: Matching your rod type to the metal thickness and position is crucial for structural integrity.
- Master the Arc Length: Keeping a consistent gap between your rod and the metal prevents the electrode from sticking.
- Travel Speed Control: Moving too fast creates a weak bead, while moving too slow leads to excessive burn-through.
- Safety First: In 2026, modern auto-darkening helmets and fire-resistant apparel are non-negotiable for operator protection.
- Practice Your Angle: Maintaining a 10 to 20-degree drag angle is the industry standard for a stable, deep-penetrating weld pool.
Understanding the Basics of Stick Welding
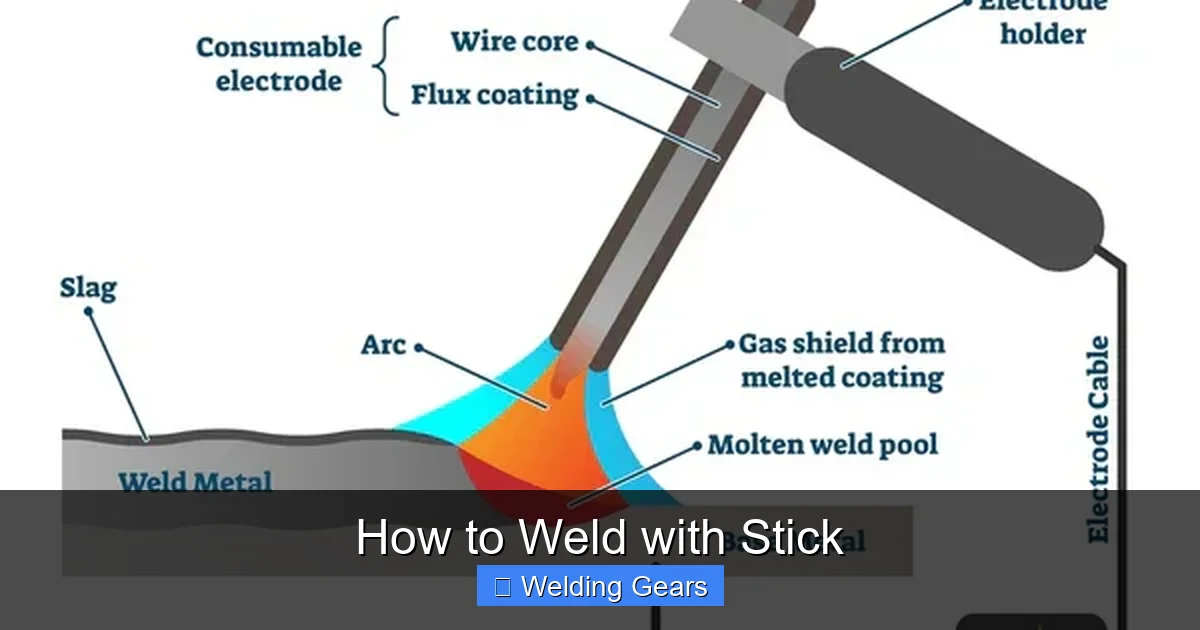
Before you strike your first arc, you need to understand what is actually happening. Stick welding, or Shielded Metal Arc Welding (SMAW), uses an electric current to melt a metal rod—called an electrode—into the joint between two pieces of metal. As the rod melts, it creates a gas shield that protects the molten puddle from the air, preventing contamination.
Essential Gear for 2026
Modern welding gear has become more accessible and safer than ever. In 2026, we prioritize comfort alongside protection. You will need a reliable DC inverter welder, a comfortable pair of leather welding gloves, and a high-quality auto-darkening helmet. Do not skimp on the helmet; it is your primary defense against harmful light and sparks.
The Role of the Electrode
Think of your electrode as the paintbrush. Different rods are designed for different jobs. For beginners, the E6011 or E7018 rods are your best friends. E6011 provides deep penetration for dirty or painted metal, while E7018 creates a smooth, clean bead that looks professional. Always store your rods in a dry place, as moisture is the enemy of a quality weld.
Setting Up Your Workspace
How you set up your station determines how well you weld. First, find a stable, non-flammable surface. A welding table is ideal, but a flat piece of steel works fine. Ensure you have proper ventilation; even with modern fume extractors, you should never weld in an enclosed space without airflow.
Visual guide about How to Weld with Stick
Image source: cdn.shopify.com
Cleaning Your Material
You cannot weld through rust, paint, or grease and expect a strong result. Grab an angle grinder with a flap disc or a heavy-duty wire brush and clean the edges of your metal until it shines like new. A clean surface means a stable arc and less frustration. If you spend five minutes cleaning, you save twenty minutes of cleanup after the weld.
Grounding Your Work
The ground clamp is the most overlooked part of the setup. It must make a direct, clean connection to your workpiece. Do not clamp it to a piece of scrap metal sitting on the table. Attach it directly to the metal you are welding to ensure a steady flow of electricity. If your arc keeps flickering, check your ground first.
How to Strike the Arc
The moment of truth is the arc strike. There are two common methods: the scratching method and the tapping method. The scratching method feels like lighting a match; you drag the tip of the rod across the metal until you feel it catch. The tapping method involves tapping the rod onto the surface like a drumstick to initiate the flow.
Maintaining the Gap
Once the arc is lit, the real work begins. You must maintain a steady gap between the tip of the rod and the metal. The golden rule is to keep the arc length roughly equal to the diameter of the rod core. If you pull away too far, the arc sputters and dies. If you push too close, the electrode will fuse to the metal, and you will have to yank it loose.
Finding the Rhythm
Listen to your weld. A good arc sounds like sizzling bacon. If it sounds like a popping corn kernel, your amperage might be too low. If it sounds like a roaring jet engine, your amperage is likely too high. Adjust your machine settings until that consistent sizzle hums through your handle.
Controlling the Weld Pool
The weld pool is the small puddle of molten metal you create. Your goal is to watch the pool, not the arc itself. The pool tells you everything you need to know about your speed and penetration. If the pool is too wide, you are moving too slow. If it is tiny and thin, you are moving too fast.
The Drag Angle
Keep your rod at a slight angle, usually about 10 to 20 degrees in the direction of travel. This angle helps push the slag—the protective byproduct of the weld—behind the molten metal. If you tilt the rod too far, the slag will get trapped in the puddle, creating inclusions that weaken the structure.
Weaving Patterns
Once you are comfortable with a straight bead, you can try basic patterns. A small “C” motion or a “Z” pattern helps you manipulate the weld pool to bridge wider gaps. Remember, the goal is to keep the movement tight and consistent. A uniform look is the hallmark of a skilled welder.
Post-Weld Cleanup and Inspection
When you finish your bead, you will see a layer of hard, dark crust over your beautiful weld. This is the slag. It is a necessary evil that protects your cooling metal. Use a chipping hammer to gently tap the slag, then use a wire brush to scrub it clean. Your weld should look shiny, smooth, and ripple-like.
Inspecting for Flaws
Examine your work closely. Look for “undercut,” which is a groove along the edges of the weld where the metal was melted away but not filled back in. If you see this, slow down your travel speed. Look for “porosity,” which looks like tiny air bubbles or craters. This usually means your arc length was too long or your metal was dirty.
Learning from Mistakes
Every professional welder started by making ugly, lumpy welds. Do not be discouraged if your first attempts look messy. Save your practice pieces and compare them to your work a week later. Seeing the progression is one of the most rewarding parts of learning how to weld with stick.
Safety Culture in 2026
Even with today’s advanced equipment, safety remains a discipline. Always wear a welding jacket or long-sleeved cotton shirt to protect your skin from UV radiation. UV light from welding can cause burns similar to a severe sunburn in just a few minutes of exposure.
Protecting Your Eyes
In 2026, there is no excuse for welding without a proper shade. Ensure your auto-darkening helmet is set to the correct shade level for the amperage you are using. A shade that is too light will hurt your eyes, while a shade that is too dark will make it impossible to see your puddle.
Fire Awareness
Keep a fire extinguisher within arm’s reach at all times. Welding creates molten sparks that can travel further than you think. Keep your floor clear of paper, oils, or flammable materials. A safe welder is a welder who can keep working for decades to come.
Stick welding is a timeless craft that rewards patience and practice. By focusing on your arc length, maintaining a clean workspace, and always putting safety first, you are well on your way to becoming proficient. Start with small, non-critical projects and build your confidence before moving to structural work. With these tips in your toolkit, you are ready to start burning rod and creating things that last a lifetime.
Frequently Asked Questions
What is the best amperage for a 1/8 inch rod?
Typically, a 1/8 inch 7018 rod performs best between 90 and 130 amps. Always start on the lower end and adjust based on your specific machine and the thickness of your metal.
Why does my rod keep sticking to the metal?
Sticking usually happens because your amperage is set too low or you are holding the electrode too close to the base metal. Try increasing your heat settings slightly and maintain a steady, firm arc length.
Can I stick weld outside in the wind?
Yes, stick welding is excellent for outdoor use because the flux coating on the rod provides its own shielding gas. Unlike MIG welding, you do not have to worry about the wind blowing away your gas coverage.
How do I know if my weld is strong?
A good weld should have a consistent, uniform appearance with minimal splatter and no trapped slag. If you are welding something structural, always perform a stress test on a scrap piece of the same thickness first.
What type of electrode should I use for beginners?
E6013 or E7018 are highly recommended for beginners because they provide a stable arc and are easy to control. They produce a smooth bead that is very forgiving for those just learning the trade.
Is it necessary to clean the metal before welding?
Absolutely, cleaning is essential for a high-quality weld. Removing rust, paint, and scale prevents contamination that can lead to cracks and weak spots in the final joint.