
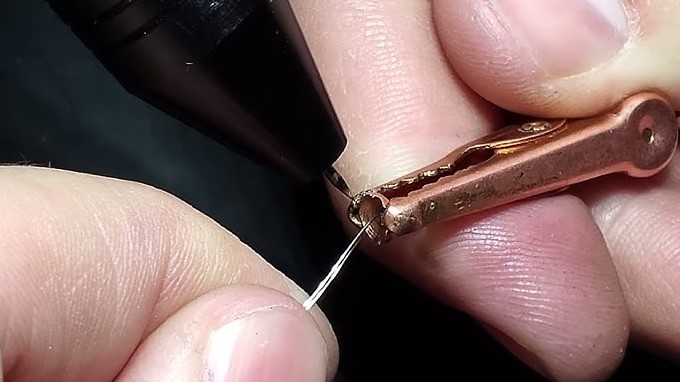
Welding thermocouple wire is a critical skill for creating precise, reliable temperature sensors in industrial and laboratory settings. By mastering the arc fusion or capacitive discharge methods, you ensure a perfect junction that guarantees accurate thermal readings for your 2026-era projects.
If you have ever found yourself needing to track temperatures in a high-heat environment, you know that standard sensors just do not cut it. You need a custom thermocouple. Knowing how to weld thermocouple wire is a superpower in the world of engineering and DIY electronics. It allows you to create a sensor that fits your exact space, shape, and performance requirements.
As we move through 2026, the technology behind temperature sensing has become more accessible than ever. However, the basic physics of the thermocouple two dissimilar metals joined at a point remains unchanged. When you weld these two wires together, you are creating a junction that produces a tiny voltage based on the temperature difference. If that weld is poor, your data will be noisy, unstable, or completely wrong. Let us dive into how to do this correctly.
Key Takeaways
- Material Compatibility: Always ensure you are using the correct thermocouple grade wire for your specific temperature range and application.
- Cleanliness is Vital: Removing oxidation and insulation residue is the secret to a high-quality, durable weld junction.
- Technique Matters: Whether using a capacitive discharge welder or a carbon arc, consistency in heat application prevents brittle joints.
- Polarity Awareness: Understanding the positive and negative leads of your thermocouple wire is essential for correct instrument calibration.
- Safety First: Never underestimate the importance of eye protection and proper ventilation when welding, even on a small scale.
Understanding the Basics of Thermocouple Junctions
Before you pick up the gear, it helps to understand what is happening inside the wire. A thermocouple works on the Seebeck Effect. When two different metal wires are joined, they generate a voltage proportional to temperature. The actual sensing happens at the junction point, not along the length of the wires. This is why the weld is the most important part of your assembly.
Why the Weld Quality Matters
Think of your thermocouple junction as the heart of your sensor. If the weld is cold, oxidized, or poorly fused, it introduces resistance. This resistance can interfere with the tiny millivolt signals your instrument is trying to read. A smooth, clean, bead-like junction ensures that heat transfer is efficient and the signal remains consistent over time.
Selecting Your Materials
By 2026, the options for thermocouple materials are vast. You might be working with Type K (Chromel-Alumel), Type J (Iron-Constantan), or even high-temperature Type R wires. Regardless of the type, remember that you must weld metals that are compatible. Never try to weld dissimilar types together unless you are intentionally creating a specialized connection. Always keep your thermocouple wire spool clean and stored in a dry place to prevent moisture from compromising the metal.
Preparation: The Secret to Success
Most beginners fail because they rush the preparation. Welding is 80% prep work and 20% actual welding. If you have dirt, oil, or insulation debris on your wires, your weld will fail or show up as a “dirty” junction that drifts in temperature. Take your time here; it pays off in the long run.
Stripping the Insulation
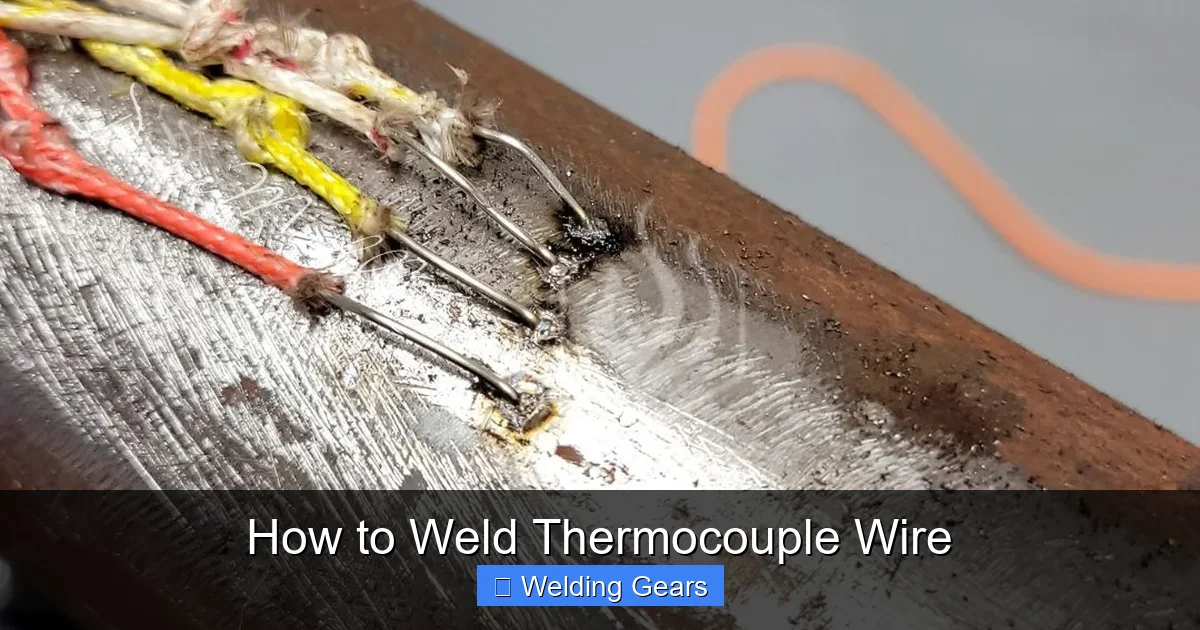
Use a pair of precision wire strippers to remove about half an inch of insulation from the ends of both wires. Be very careful not to nick the metal. Any scratch on the wire can create a stress riser, which might lead to the wire snapping later during thermal cycling. Use a light touch.
Cleaning the Metal
Once the wire is exposed, look for oxidation. Dull or discolored wire is a sign of age. Use a fine-grit sanding pad or a specialized glass fiber brush to gently clean the ends of the wires until they look bright and shiny. Do not touch the clean metal with your bare fingers afterward, as the oils from your skin can cause inclusions in the weld. If you do touch them, wipe the tips with a bit of high-purity isopropyl alcohol.
The Capacitive Discharge Welding Method
In 2026, the most popular way to weld thermocouple wire is the capacitive discharge (CD) welder. These are compact, portable devices that store a specific amount of electrical energy in a capacitor and release it in a split second. This quick burst of energy is perfect for small-diameter thermocouple wires because it prevents overheating the rest of the wire insulation.
Setting Up Your CD Welder
Start by adjusting the power settings on your unit. If the energy is too low, you will get a “cold” weld that does not fully fuse the metals. If it is too high, you will vaporize the tips of your wires, leaving you with nothing to weld. Most modern welders come with a guide based on wire gauge. Start on the lower end of the recommended power and work your way up until you get a nice, rounded bead.
Executing the Weld
Hold the two stripped ends of the wire together. You can twist them slightly if you like, but a clean side-by-side contact is often cleaner. Touch the tips to the carbon rod electrode of the welder. When the circuit closes, you will see a quick flash—that is the weld happening. If you have done it correctly, you should see a small, spherical bead at the very tip of the junction.
Alternative Methods: Gas and Carbon Arc
If you do not have a dedicated capacitive discharge welder, there are other ways to get the job done. While less common in modern labs, these methods are excellent for field repairs or budget-conscious setups. Each has its own learning curve, so practice on scrap wire first.
The Carbon Arc Method
The carbon arc method uses a carbon electrode and a DC power supply. You ground one side to the wire and use the carbon rod to create an arc at the junction. This is a very hot process. You must work quickly. Because it involves an open arc, you must wear proper eye protection a standard welding helmet is too dark, but professional-grade safety glasses with an IR filter are a must.
Gas Welding Considerations
While some specialized technicians use tiny oxy-acetylene torches for heavy-gauge wire, this is rarely recommended for standard thermocouple work. It is extremely difficult to control the heat, and you often end up melting more of the wire than you intended. Stick to electrical fusion methods whenever possible for consistent, high-accuracy results.
Testing and Verifying Your Work
Once your weld has cooled, do not just install it in your machine. You need to verify that it is actually a good junction. Testing ensures that your hard work will hold up under real-world conditions.
The Visual Inspection
Look at your junction through a magnifying glass. You are looking for a perfectly round bead. If the bead is jagged or has black soot around it, your weld was either too hot or contaminated. A clean, shiny bead indicates a successful fusion that will provide a stable signal for years.
The Multimeter Test
Use a digital multimeter to check the continuity of your thermocouple. While you cannot check the temperature output easily without a reference source, you can ensure that the circuit is complete. You can also perform a “flex test.” Gently bend the wires near the junction. If the weld snaps, it was brittle usually a sign that you used too much power or allowed it to cool too slowly.
Common Challenges and How to Fix Them
Even with the best gear, you might run into issues. Troubleshooting is part of the process. In 2026, we have better diagnostic tools, but the underlying problems are the same as they were decades ago.
Dealing with “Cold” Welds
A cold weld happens when the energy wasn’t high enough to fully melt the two metals together. The result is a mechanical bond that isn’t a true electrical junction. You will notice this when your readings are erratic or if the thermocouple drifts significantly over a short period. Simply trim the tip, clean it, and try again with a slightly higher power setting.
Managing Fragile Wires
When working with very thin gauge wire like 36 AWG or finer the metal is incredibly delicate. It is easy to accidentally burn the wire back further than the junction. To prevent this, use a heat sink. You can clamp a pair of metal tweezers onto the wire just behind the point you are welding. The tweezers will draw away excess heat and keep the wire insulation and the integrity of the lead intact.
Learning how to weld thermocouple wire is a journey. It requires patience, a steady hand, and an attention to detail that sets a professional apart from a novice. Whether you are building custom sensors for a 2026 research lab or just fixing a thermal probe in your workshop, these steps will help you achieve a reliable connection. Remember, the quality of your data starts at the junction. Keep your tools clean, your settings consistent, and your welds bright. Happy welding!
Frequently Asked Questions
What is the best welding method for beginners?
The capacitive discharge (CD) welder is the best choice for beginners because it provides consistent energy bursts. It is easy to use, portable, and produces a reliable, clean junction with minimal risk of overheating the wire.
Can I use a regular soldering iron to join thermocouple wires?
No, you should never use solder for thermocouple junctions. Solder introduces a third metal into the connection, which ruins the Seebeck effect and leads to highly inaccurate temperature readings.
How do I know if my thermocouple weld is bad?
A bad weld often appears dark, oxidized, or jagged rather than having a clean, spherical bead. If the reading on your instrument is jumping around or drifting significantly, it is a sign that your junction has high resistance and needs to be re-welded.
Do I need a protective gas shield for welding?
While an inert gas shield can produce a cleaner, “bright” weld, it is not strictly necessary for most thermocouple types. Standard arc fusion in the open air is generally acceptable if you ensure the wires are perfectly clean before starting.
Why does my thermocouple wire keep snapping at the junction?
If the wire snaps near the junction, it has likely become brittle due to excessive heat or prolonged exposure to the arc. Try reducing your weld power setting or using a heat sink, like metal tweezers, to draw away extra heat during the process.
Is it possible to weld different types of thermocouple wire together?
You should not weld different types of thermocouple wire together. Doing so creates an “extension” error where the junction produces a signal that does not correspond to standard calibration curves, resulting in incorrect data.